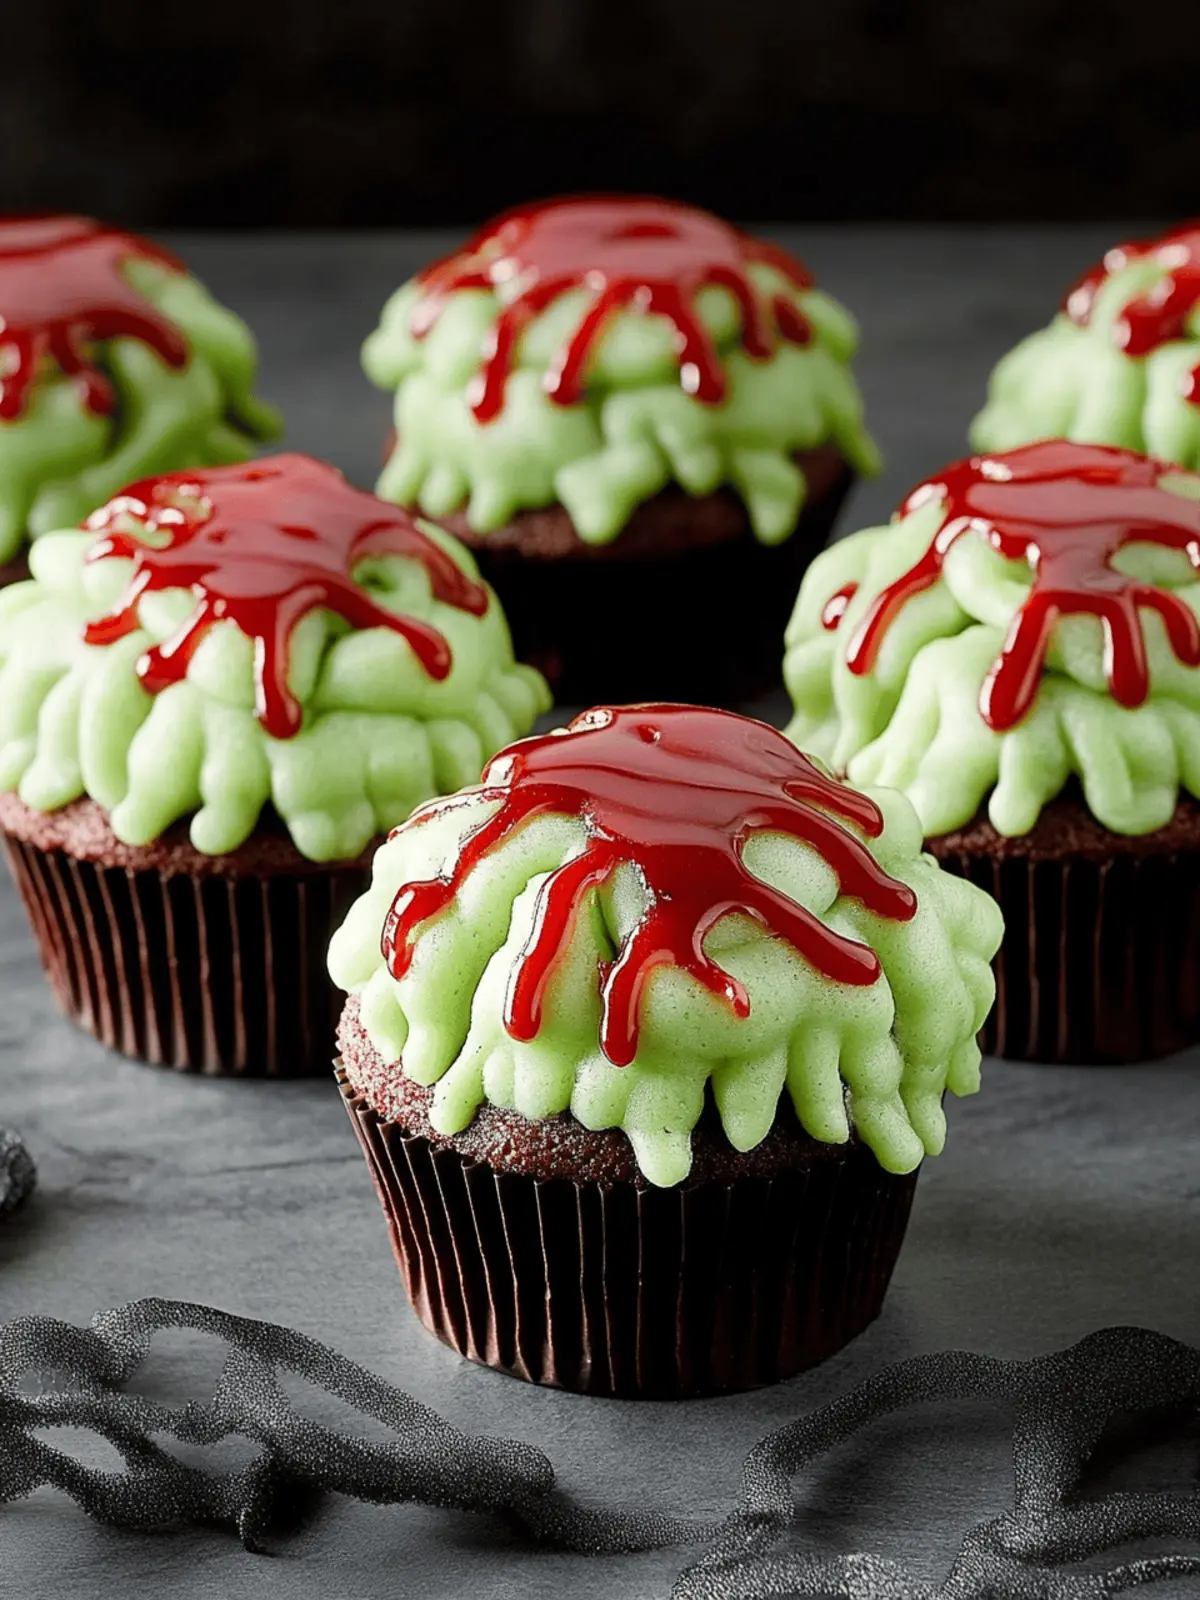
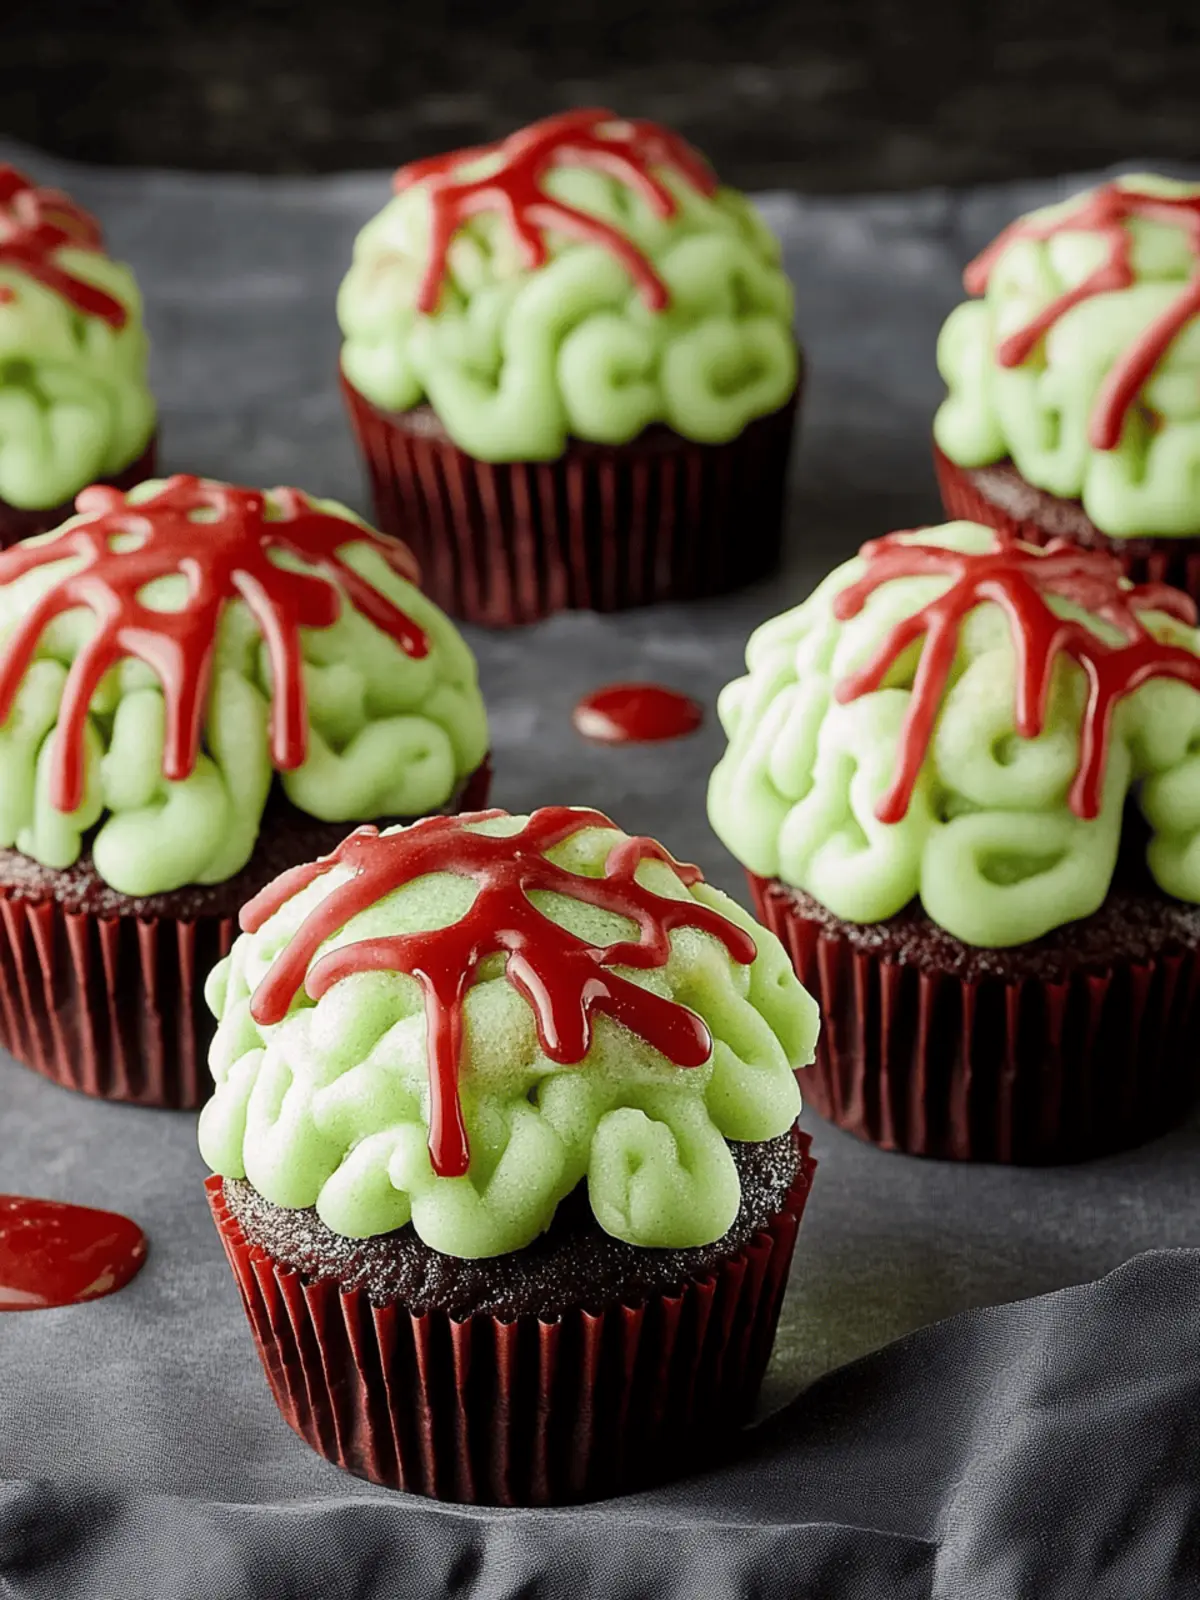
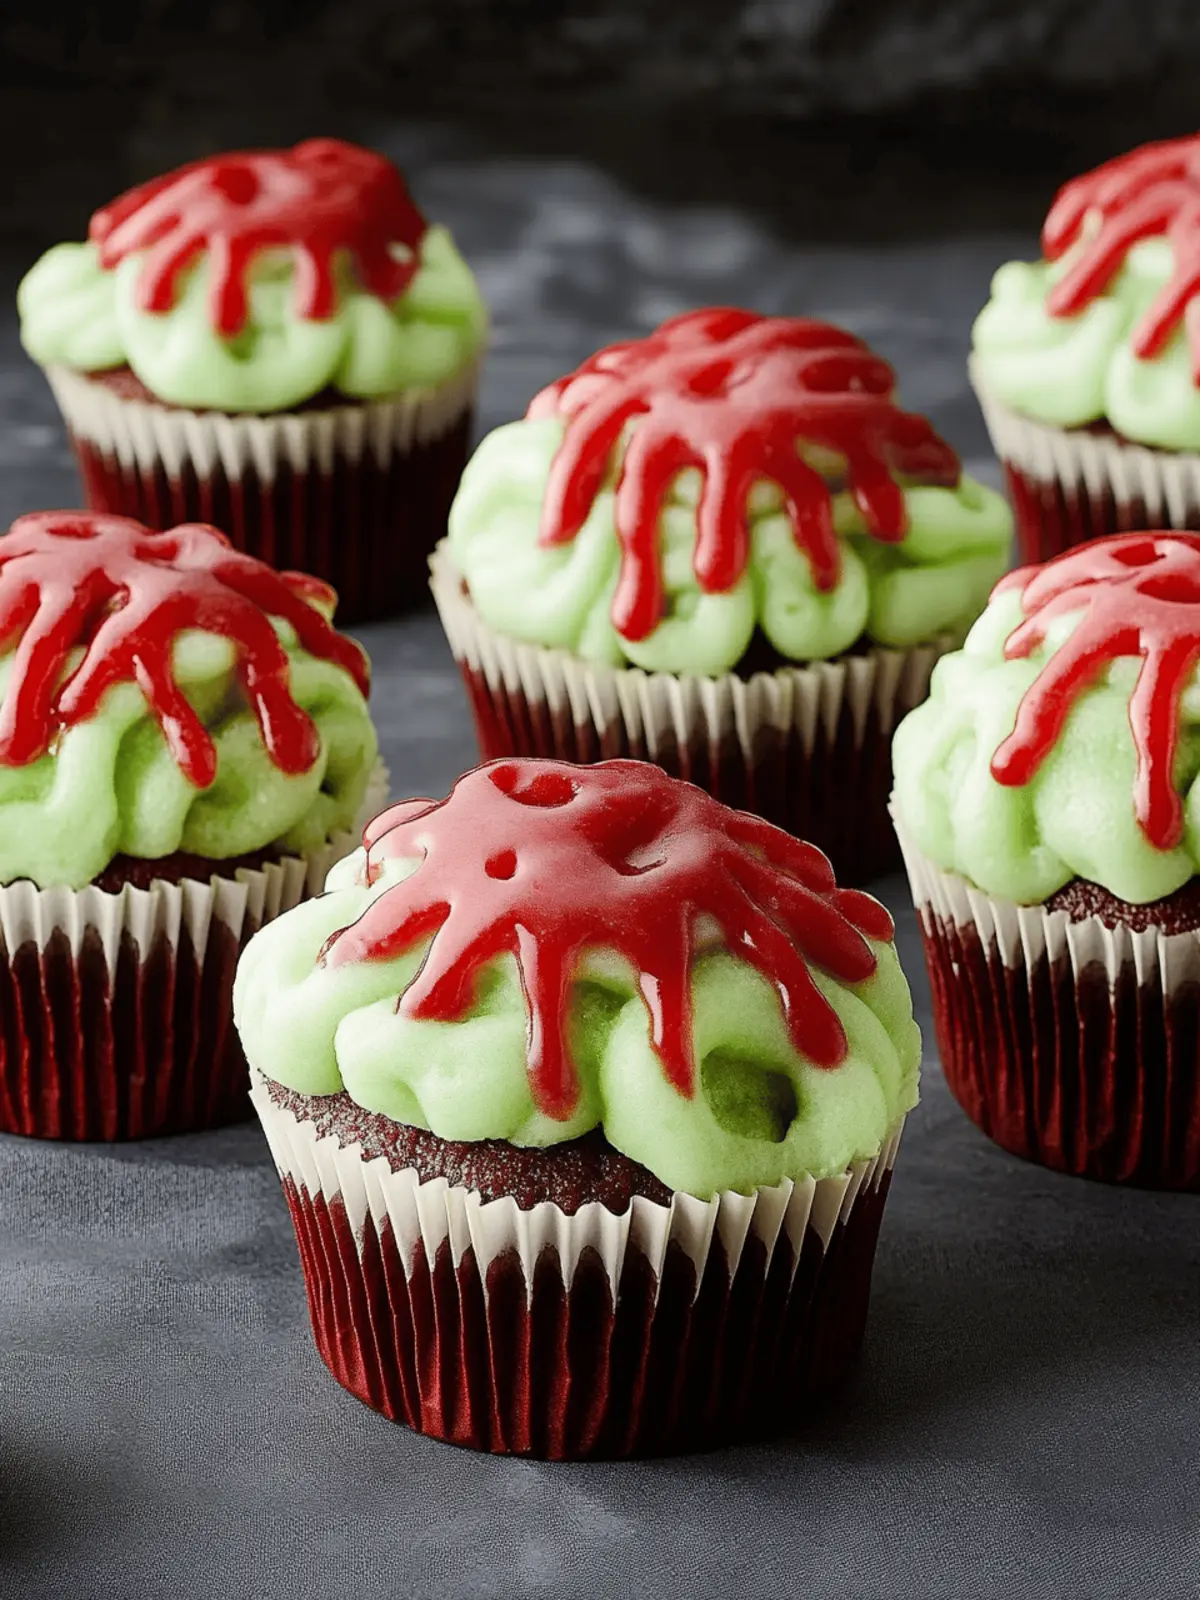
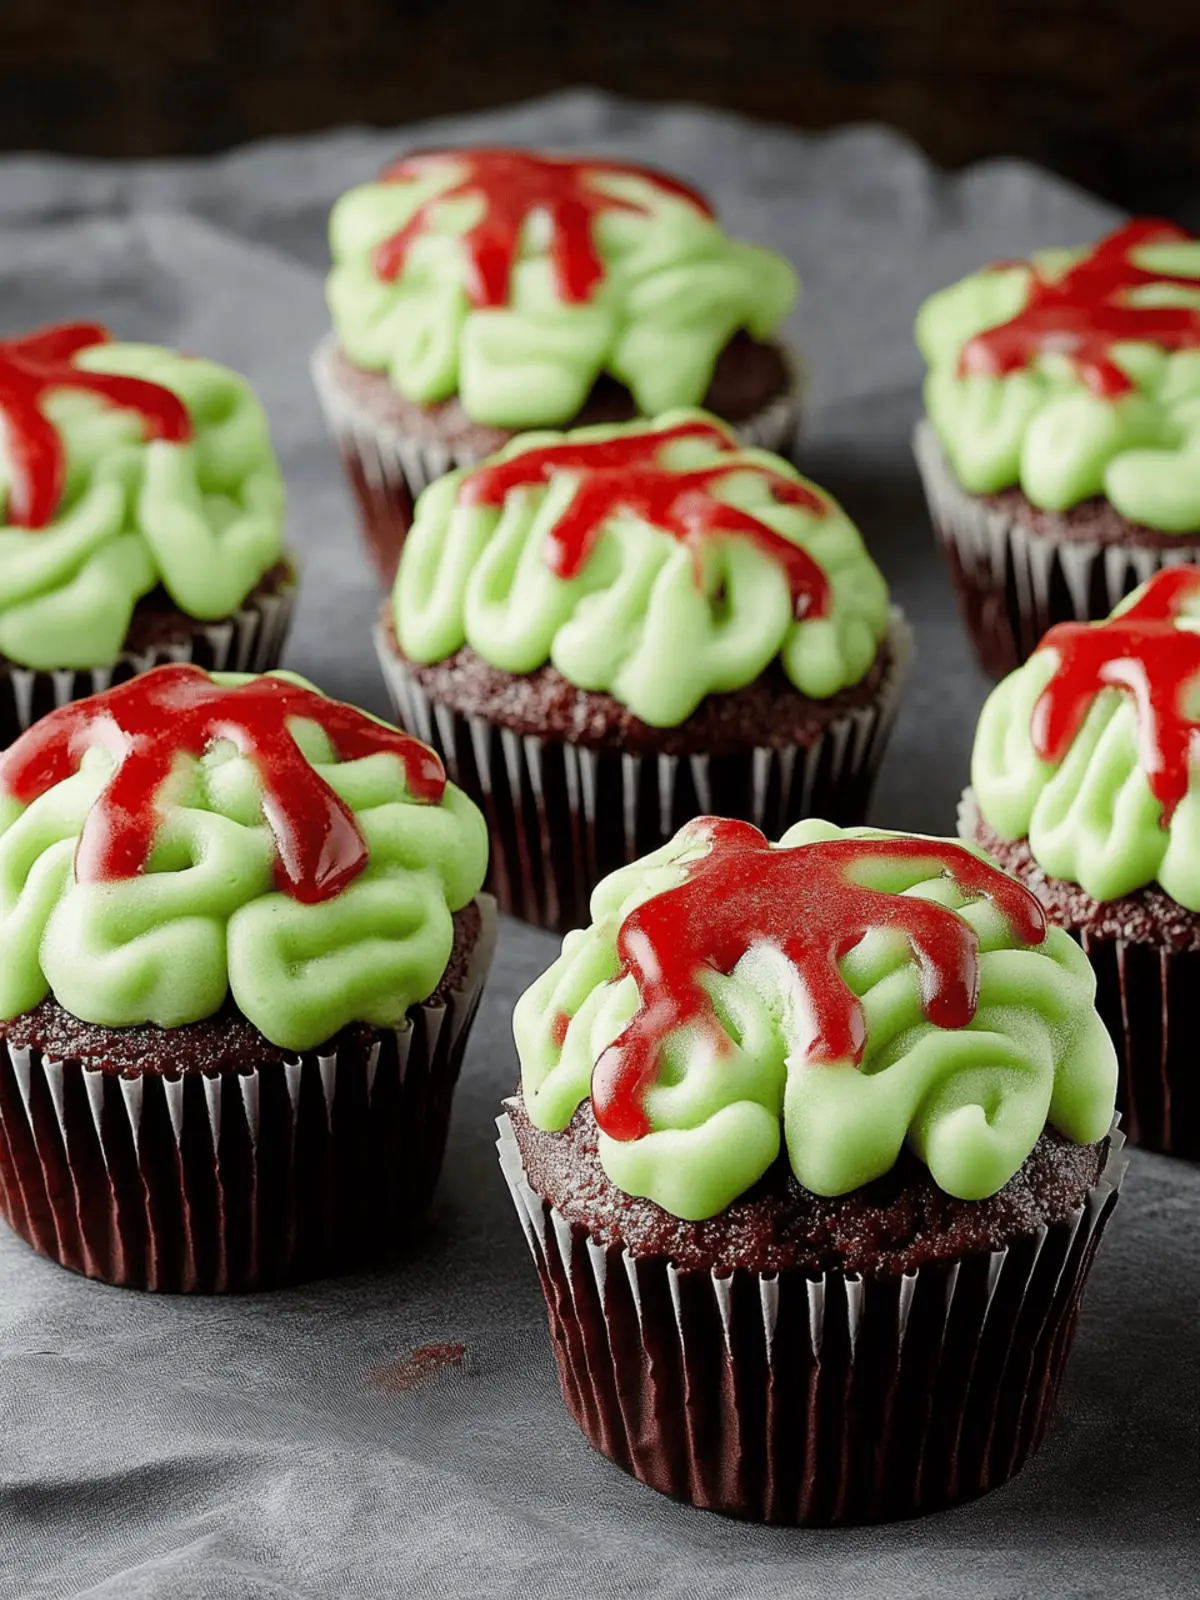
As the sun sets and a chill fills the air, Halloween whispers its way into our kitchens, beckoning us to create something delightfully spooky. Picture this: the satisfyingly moist crumb of a chocolate cupcake, topped with a bright, eerie swirl of vanilla frosting that resembles, well, a zombie brain. These Zombie Brain Cupcakes aren’t just treats; they’re the playful centerpiece of any Halloween gathering, guaranteed to elicit gasps and giggles from your guests. With a dash of neon food coloring and a drizzle of sinister red gel, they become both a feast for the eyes and a delicious indulgence that banishes bland fast food from the memory. Whether you’re hosting a frightful festivity or simply craving a fun baking project, dive into this easy recipe that perfectly marries creativity with scrumptiousness. Let’s conjure up some spooky sweetness!
Why Zombie Brain Cupcakes Are a Must-Try?
Spooky Appeal: These fun cupcakes are the ideal treat for Halloween, capturing everyone’s attention with their terrifyingly tasty design.
Easy to Make: With simple ingredients and straightforward steps, you can whip these up even on a busy day.
Flavor Explosion: The combination of rich chocolate cake and creamy vanilla frosting creates a delectable balance that will tantalize your taste buds.
Crowd-Pleasing: Perfect for parties, these cupcakes will get guests raving and snapping photos, making them the highlight of your Halloween festivities.
Customizable Fun: Feel free to personalize your cupcakes with creative decorations, ensuring each one is uniquely spooky!
Get ready to impress your family and friends with these delightful Zombie Brain Cupcakes that are as delicious to eat as they are fun to make!
Zombie Brain Cupcake Ingredients
For the Cupcakes
• All-Purpose Flour – Provides structure to the cupcake; substitute with gluten-free flour for a gluten-free version.
• Granulated Sugar – Sweetens the cupcakes; no direct substitution, but consider a sugar alternative for low-sugar options.
• Unsweetened Cocoa Powder – Adds deep chocolate flavor; use Dutch-processed cocoa for a smoother taste.
• Baking Powder – Helps the cupcakes rise; ensure it’s fresh for best results.
• Baking Soda – Works alongside baking powder for leavening.
• Kosher Salt – Enhances flavors; you can use regular table salt, but adjust the quantity as needed.
• Buttermilk or Whole Milk – Moisturizes the batter for a tender crumb; substitute with almond milk or other non-dairy milk for a dairy-free version.
• Neutral Oil – Adds moisture and tenderness; can be replaced with melted coconut oil for a lighter flavor.
• Large Egg, Beaten – Binds the ingredients; for vegan options, replace with 1/4 cup of applesauce or a flax egg.
• Pure Vanilla Extract – Flavors the frosting and cupcakes; consider vanilla bean paste for an enhanced flavor.
• Boiling Water – Adds moisture and deepens chocolate flavor; hot coffee can also add a richer taste.
For the Frosting
• Powdered Sugar, Sifted – Sweetens and stabilizes the frosting; be sure it’s sifted to avoid lumps.
• Unsalted Butter, Room Temperature – Creates a rich, creamy frosting; for dairy-free options, use vegan butter.
• Neon Green Liquid Food Coloring – Provides the spooky brain effect; adjust quantity depending on desired color intensity.
For the Decoration
• Red Decorating Gel – Adds the finishing bloody touch; make sure it’s food-safe for the best results.
How to Make Zombie Brain Cupcakes
-
Preheat the Oven:
Begin by preheating your oven to 350°F (175°C) and lining a cupcake tin with colorful wrappers. This initial step sets the stage for your spooky baking adventure! -
Mix the Dry Ingredients:
In a large mixing bowl, whisk together 1 ¾ cups all-purpose flour, 1 ½ cups granulated sugar, ¾ cup unsweetened cocoa powder, 1 ½ teaspoons baking powder, 1 teaspoon baking soda, and ½ teaspoon kosher salt until well combined. -
Combine Wet Ingredients:
In another bowl, blend together 1 cup buttermilk (or dairy-free substitute), ½ cup neutral oil, 1 beaten large egg, and 2 teaspoons pure vanilla extract. Be sure everything is well mixed for a harmonious batter! -
Combine Wet and Dry Mixtures:
Pour the wet ingredients into the bowl with the dry ones and stir until just combined. -
Add Boiling Water:
Gradually stir in 1 cup of boiling water until you achieve a smooth and thin batter. This step enhances the chocolate flavor and adds moisture. -
Fill the Liners:
Pour the batter into the prepared cupcake liners, filling each about two-thirds full. This ensures they have the perfect rise during baking. -
Bake:
Place the tin in the preheated oven and bake for 20-25 minutes, or until a toothpick inserted in the center comes out clean. Let them cool completely on a wire rack. -
Prepare the Frosting:
In a large bowl, beat 1 cup of room-temperature unsalted butter until creamy. Gradually add 4 cups of sifted powdered sugar, 1 teaspoon vanilla extract, and a pinch of salt until your frosting is light and fluffy. Add neon green food coloring until you reach your desired spookiness! -
Frost the Cupcakes:
Generously frost the cooled cupcakes with the green frosting, using a piping bag to create a textured, brain-like appearance. -
Decorate with Gel:
Finally, drizzle red decorating gel over the frosted cupcakes to give them that chilling, bloody effect.
Optional: Top with edible glitter or spooky sprinkles for an extra festive touch!
Exact quantities are listed in the recipe card below.
Zombie Brain Cupcake Variations
Feel free to get creative with these variations that can take your spooky creations to the next level!
-
Gluten-Free: Substitute all-purpose flour with a gluten-free blend to cater to those with dietary restrictions without sacrificing taste.
-
Vegan Delight: Replace the egg with 1/4 cup of applesauce or a flax egg, and use almond milk instead of buttermilk for a delightful vegan treat. The kids won’t even notice!
-
Chocolate Frosting: Swap out the vanilla frosting for a rich chocolate frosting for a darker, more decadent cupcake that’s sure to be a hit with chocolate lovers.
-
Pumpkin Spice: Add 1 cup of canned pumpkin puree and 2 tsp of pumpkin pie spice to the batter for an autumn twist that feels festive and delicious.
-
Ghostly White: Use white frosting and top with dark chocolate shavings for a ghostly look that’s hauntingly good yet still deliciously inviting.
-
Creepy Crawlers: Decorate your cupcakes with gummy worms or edible eyeballs for a fun surprise that kids will love, adding a playful touch to your spooky creations.
-
Red Velvet Zombies: Create red velvet cupcakes instead of chocolate and frost them with green icing for a different flavor and a delightful twist on the classic design.
-
Spicy Kick: Incorporate a pinch of cayenne pepper into the batter for those who enjoy a sweet treat with a little heat, adding a surprising twist with every bite!
Each of these variations adds its own charm while keeping the spirit of Halloween alive—so don’t hesitate to experiment!
Make Ahead Options
These Zombie Brain Cupcakes are perfect for meal prep enthusiasts looking to save time during Halloween festivities! You can bake the cupcakes up to 3 days in advance, allowing them to cool completely before storing them in an airtight container at room temperature to maintain moisture. For the frosting, prepare it a day ahead and refrigerate it, just be sure to let it sit at room temperature for about 30 minutes before you frost the cupcakes to ensure it spreads easily. When you’re ready to serve, frost the cupcakes and drizzle with red decorating gel for that chilling, final touch. With these make-ahead tips, you’ll enjoy deliciously spooky treats without the last-minute rush!
Tips for the Best Zombie Brain Cupcakes
-
Room Temperature Ingredients: Ensure your butter and eggs are at room temperature for a smoother batter and frosting. This helps achieve the perfect texture in your Zombie Brain Cupcakes.
-
Sifting Powdered Sugar: Always sift your powdered sugar before adding it to the frosting. This avoids lumps and guarantees a silky smooth finish to your spooky treats.
-
Boiling Water Trick: Don’t skip the boiling water in the batter! It enhances the chocolate flavor and ensures your cupcakes remain moist and tender, giving them a melt-in-your-mouth delight.
-
Piping Technique: Use a piping bag with a wide tip for frosting to create a brain-like texture. Practice on a plate first if you’re unsure; it can make decorating more fun and less messy!
-
Cool Before Frosting: Allow cupcakes to cool completely before frosting to prevent the icing from melting away. The contrast of cold frosting against the warm cupcake adds to the flavor experience!
-
Customization with Color: Adjust the amount of neon green food coloring based on your spooky theme. Start with a few drops, and remember that less is often more for achieving the desired creepiness.
What to Serve with Zombie Brain Cupcakes?
As you whip up these ghoulish delights, consider pairing them with fun and festive sides to create a complete Halloween experience.
-
Spooky Sugar Cookies:
Soft and sweet sugar cookies decorated with ghoulish designs add a playful touch to your dessert table. -
Witch’s Brew Punch:
A bubbling concoction of fruit juices and soda, this refreshing drink will enchant your guests and keep the festivities alive. -
Caramel Apple Slices:
Crisp apple slices drizzled with warm caramel provide a delicious contrast to the rich chocolate cupcakes and stay true to the fall theme. -
Cheddar and Ghost Crackers:
Creamy cheddar cheese alongside ghost-shaped crackers brings a savory option to balance the sweetness of your spooky treats. -
Monster Fruit Kabobs:
Colorful fruits on skewers, featuring spooky faces made from melon and grapes, offer a nutritious yet fun edible option among all the sugar. -
Haunted Hot Chocolate:
Rich, warm hot chocolate topped with whipped cream and a sprinkle of crushed cookies makes a cozy drink that complements the spooky theme perfectly. -
Pumpkin Pie Dip:
This creamy, spiced dip served with graham crackers connects delightful fall flavors to your ghostly dessert, creating a seasonal festivity!
Together, these pairings will enhance the delight your Zombie Brain Cupcakes bring to your Halloween celebrations!
Storage Tips for Zombie Brain Cupcakes
Fridge: Store frosted Zombie Brain Cupcakes in an airtight container in the refrigerator for up to one week to keep them fresh and moist.
Freezer: Unfrosted cupcakes can be frozen for up to 3 months. Wrap each cupcake tightly in plastic wrap and place them in a freezer bag. Thaw completely before frosting.
Reheating: If you prefer warm cupcakes, place them in the microwave for about 10-15 seconds. This helps restore that just-baked texture without drying them out.
Preventing Stale Frosting: If you have leftover frosting, store it in an airtight container in the fridge for up to two weeks. Allow it to come to room temperature and re-whip before using.
Zombie Brain Cupcakes Recipe FAQs
How do I select the best ingredients for the Zombie Brain Cupcakes?
Absolutely! When choosing ingredients, look for all-purpose flour with no additives and check the expiration date on your baking powder and soda to ensure they’re fresh. For cocoa powder, I recommend selecting Dutch-processed for a smoother flavor. Use room temperature butter for the frosting to achieve a light texture, and choose vibrant neon food coloring for an eye-catching effect.
How should I store my Zombie Brain Cupcakes?
Store your baked Zombie Brain Cupcakes in an airtight container in the refrigerator for up to one week. This keeps them fresh and moist. If you’ve got leftover cupcakes—lucky you!—be sure to remove any decorative toppings before refrigerating.
Can I freeze the Zombie Brain Cupcakes?
Absolutely! You can freeze uncooked or unfrosted cupcakes for up to 3 months. First, cool them completely, then wrap each individually in plastic wrap and place them in a freezer-safe bag. When you’re ready to enjoy, just thaw at room temperature or microwave for 10-15 seconds to revive that freshly baked taste, and then frost when fully thawed.
What if my frosting is too runny for decorating?
No worries, this happens sometimes! If your vanilla frosting is too runny, simply add a little more sifted powdered sugar, a tablespoon at a time, until you reach the desired consistency. Beat it well after each addition. If you find it too thick, a drop of milk can help loosen it up. Don’t be afraid to adjust it to your liking!
Are there any allergy concerns for the Zombie Brain Cupcakes?
Yes, as with any recipe, ingredient swaps might be necessary. The traditional ingredients include gluten, dairy, and eggs. For those with allergies: use gluten-free flour, dairy-free milk, vegan butter, and a flax egg or applesauce instead of a large egg. Always consider cross-contamination if you’re baking for someone with severe allergies.
How can I customize the appearance of my Zombie Brain Cupcakes?
Customization is part of the fun! Consider using different colors for your frosting—such as pink for a more anatomical look, or sprinkle with edible glitter for a festive touch. Another idea is to use chocolate frosting instead of vanilla for a darker, spookier effect. You might even add fun edible eyes or creepy decorations to give your cupcakes a more haunting vibe.
Deliciously Spooky Zombie Brain Cupcakes for Halloween Fun
Ingredients
Equipment
Method
- Preheat your oven to 350°F (175°C) and line a cupcake tin with colorful wrappers.
- In a large mixing bowl, whisk together the flour, sugar, cocoa powder, baking powder, baking soda, and kosher salt until combined.
- In another bowl, blend buttermilk, neutral oil, beaten egg, and pure vanilla extract.
- Pour the wet ingredients into the dry ingredients and stir until just combined.
- Gradually stir in boiling water until smooth.
- Pour the batter into prepared cupcake liners, filling each about two-thirds full.
- Bake for 20-25 minutes or until a toothpick comes out clean. Let cool on a wire rack.
- Beat room temperature unsalted butter until creamy, then gradually add sifted powdered sugar, vanilla extract, and a pinch of salt until light and fluffy.
- Add neon green food coloring until desired spookiness is reached.
- Frost the cooled cupcakes generously using a piping bag to create a textured appearance.
- Drizzle red decorating gel over the frosted cupcakes for a chilling effect.

